Notice: Function _load_textdomain_just_in_time was called incorrectly. Translation loading for the all-in-one-seo-pack domain was triggered too early. This is usually an indicator for some code in the plugin or theme running too early. Translations should be loaded at the init action or later. Please see Debugging in WordPress for more information. (This message was added in version 6.7.0.) in /virtual/mcu03iphuk/public_html/radiology-technologist.info/wp-includes/functions.php on line 6114

Notice: Function _load_textdomain_just_in_time was called incorrectly. Translation loading for the easy-fancybox domain was triggered too early. This is usually an indicator for some code in the plugin or theme running too early. Translations should be loaded at the init action or later. Please see Debugging in WordPress for more information. (This message was added in version 6.7.0.) in /virtual/mcu03iphuk/public_html/radiology-technologist.info/wp-includes/functions.php on line 6114

Notice: Function _load_textdomain_just_in_time was called incorrectly. Translation loading for the urvanov-syntax-highlighter domain was triggered too early. This is usually an indicator for some code in the plugin or theme running too early. Translations should be loaded at the init action or later. Please see Debugging in WordPress for more information. (This message was added in version 6.7.0.) in /virtual/mcu03iphuk/public_html/radiology-technologist.info/wp-includes/functions.php on line 6114

Notice: Function _load_textdomain_just_in_time was called incorrectly. Translation loading for the breadcrumb-navxt domain was triggered too early. This is usually an indicator for some code in the plugin or theme running too early. Translations should be loaded at the init action or later. Please see Debugging in WordPress for more information. (This message was added in version 6.7.0.) in /virtual/mcu03iphuk/public_html/radiology-technologist.info/wp-includes/functions.php on line 6114

Notice: Function _load_textdomain_just_in_time was called incorrectly. Translation loading for the advanced-ads domain was triggered too early. This is usually an indicator for some code in the plugin or theme running too early. Translations should be loaded at the init action or later. Please see Debugging in WordPress for more information. (This message was added in version 6.7.0.) in /virtual/mcu03iphuk/public_html/radiology-technologist.info/wp-includes/functions.php on line 6114

Notice: 関数 _load_textdomain_just_in_time が誤って呼び出されました。lancr ドメインの翻訳の読み込みが早すぎました。これは通常、プラグインまたはテーマの一部のコードが早すぎるタイミングで実行されていることを示しています。翻訳は init アクション以降で読み込む必要があります。 詳しくは WordPress のデバッグをご覧ください。 (このメッセージはバージョン 6.7.0 で追加されました) in /virtual/mcu03iphuk/public_html/radiology-technologist.info/wp-includes/functions.php on line 6114

Warning: Cannot modify header information - headers already sent by (output started at /virtual/mcu03iphuk/public_html/radiology-technologist.info/wp-includes/functions.php:6114) in /virtual/mcu03iphuk/public_html/radiology-technologist.info/wp-content/plugins/all-in-one-seo-pack/app/Common/Meta/Robots.php on line 87

Warning: Cannot modify header information - headers already sent by (output started at /virtual/mcu03iphuk/public_html/radiology-technologist.info/wp-includes/functions.php:6114) in /virtual/mcu03iphuk/public_html/radiology-technologist.info/wp-includes/feed-rss2.php on line 8
CUDA | 診療放射線技師がPythonをはじめました。 http://radiology-technologist.info 診療放射線技師のPython日記。解析等で使えるコードを作成、アップしていきたいと思っています。その他いろいろ Sat, 01 May 2021 09:30:39 +0000 ja hourly 1 https://wordpress.org/?v=6.7.1 https://i0.wp.com/radiology-technologist.info/wp-content/uploads/2018/09/cropped-logo5.png?fit=32%2C32 CUDA | 診療放射線技師がPythonをはじめました。 http://radiology-technologist.info 32 32 164362728 GPU版 tensorflowをセットアップ②(tensorflowと動作確認) http://radiology-technologist.info/post-1198 Mon, 01 Mar 2021 10:55:29 +0000 http://radiology-technologist.info/?p=1198 前回は、GPU版tensorflowのセットアップ […]

The post GPU版 tensorflowをセットアップ②(tensorflowと動作確認) first appeared on 診療放射線技師がPythonをはじめました。.]]>
前回は、GPU版tensorflowのセットアップでCuda ToolkitとcuDNNのインストールを行いました。今回は、tensorflowのインストールと、動作確認をします。

実際、私はCuda Toolkit11.2.0とcuDNNの8.0をインストール動作確認をしたのですが、どうしてもGPUの認識がしなかったのでその辺りの解決法も記載します。


今回の流れ

今回の作業の流れを紹介します。

  1. 仮想環境の構築
  2. tensorflowのインストール
  3. 動作確認
  4. GPUが認識しないときの対応


広告
デル株式会社

tensorflowインストール前の仮想環境構築

まずは、仮想環境の構築を行います。

tensorflowは様々なライブラリーと依存関係がありそのバージョンも変わってきます。また、Cuda ToolkitのバージョンによってPythonのバージョンが違います。前回調べたCuda Toolkitの、cuDNNの適応表にPythonの対応バージョンも載っているので確認してください。ここのリンク先ページ中央
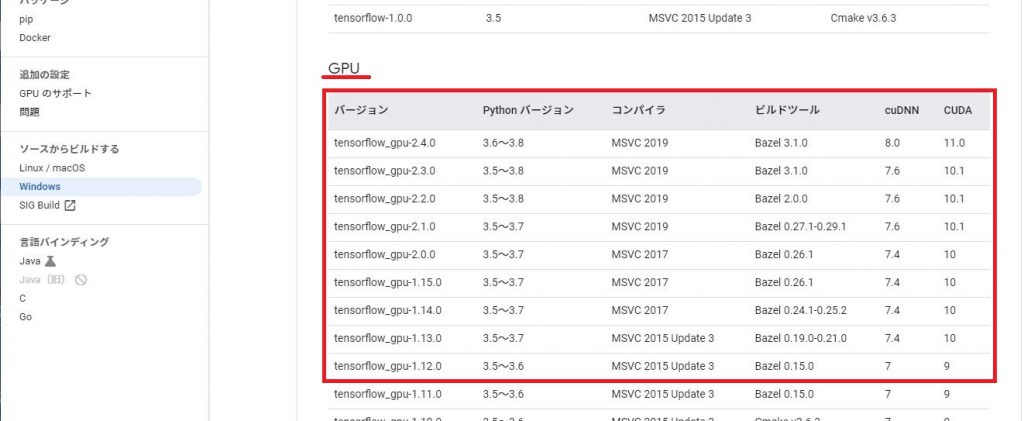
Cuda ToolkitのcuDNN適応表

Pythonのバージョンは3.6~3.8で対応しているのが確認できます。

仮想環境の構築は以前こちらのページで紹介しています。

それでは、仮想環境の構築をしていきます。

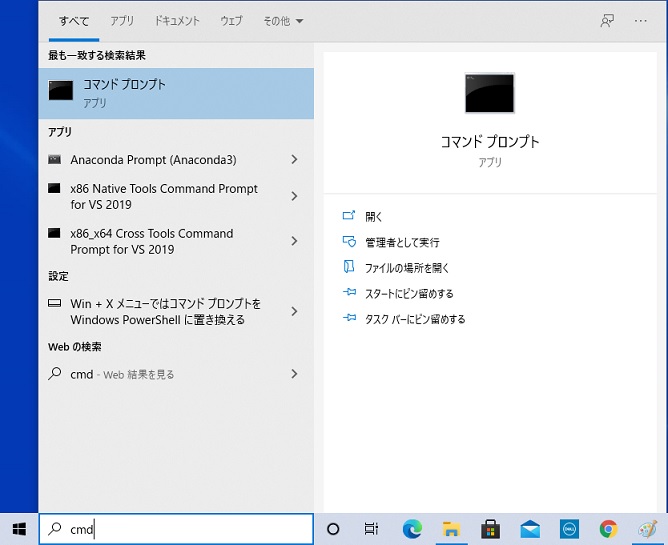
画面左下の検索ボックスに「cmd」と打ち込むことでコマンドプロンプトを起動します。
今回は、Pythonのバージョン3.6、tensorflow2.4.0で構築したいと思います。

環境名はわかりやすいようにtf240としました。

コマンドプロンプトに

conda create -n tf240 python=3.6

と入力すると

パッケージとなるライブラリーが表示されて、これでいいですか?と聞かれますので「y」でインストールを開始します。
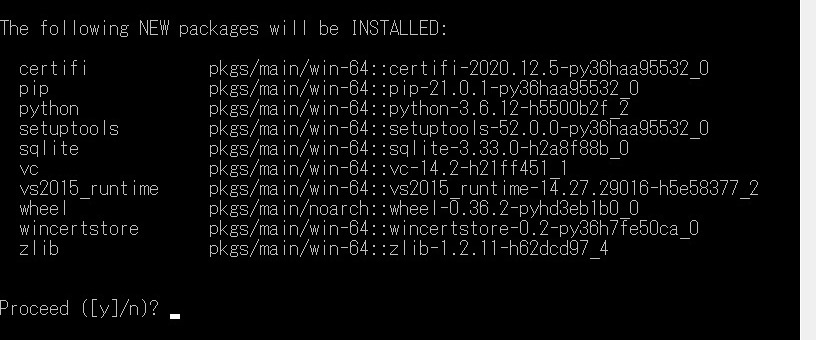
インストールが完了すると仮想環境のアクティべートと、デアクティベートのコマンドの説明があります。

これで仮想環境の第1段階が終了です。
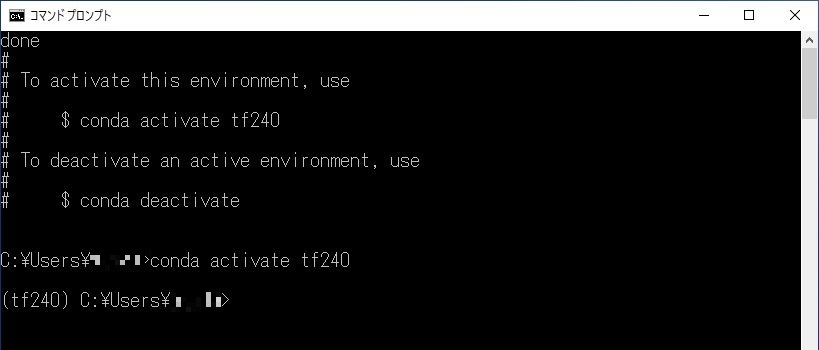
それでは、いよいよtensorflowのインストールに入ります。


広告
HP Directplus -HP公式オンラインストア-

tensorflowのインストール

いよいよ、tensorflowのインストールです。

仮想環境構築の時と同様、検索ボックスに「cmd」と入力してコマンドプロンプトを起動します。

まずは、先ほど作成した仮想環境をアクティベートします。

conda activate tf240
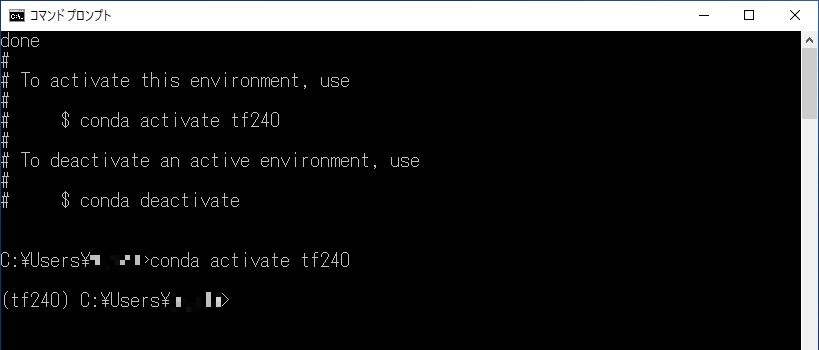
アクティベートされると行の初めにカッコで環境名が表示されます。

その状態で

pip install tensorflow==2.4.0

と入力することでインストールが始まります。ここで気を付けてもらいたいのがバージョンを指定する場合、イコールを2つ繋げることです。
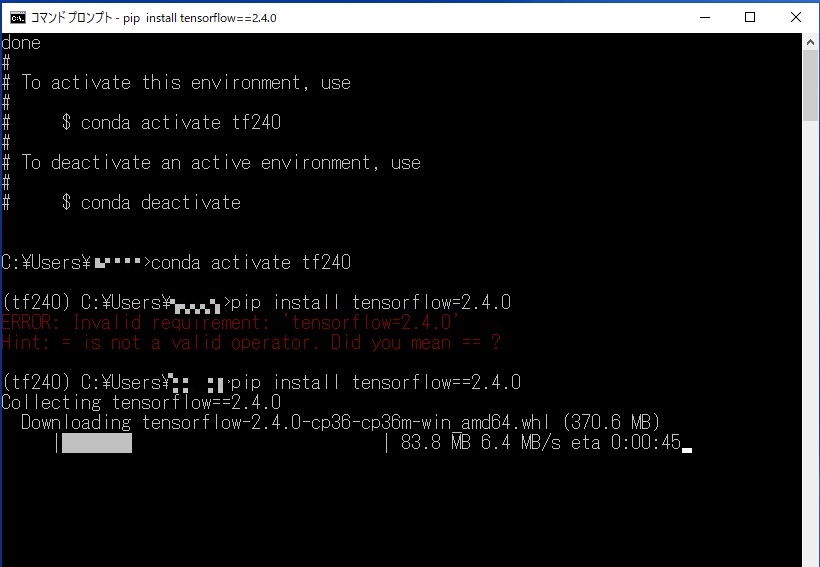
私は繋げることを忘れて怒られてしまいました。コマンドプロンプトでフォントに色がつくなんてそうそうありません。相当怒らせてしまったのかもしれません・・・・

tensorflowはバージョン1の代ではCPU版とGPU版が別々にありましたが、バージョンが2代になってからは、ライブラリーが共通になっています。

インストールは無事に終わりましたか?

続いて、動作確認に入ります。


広告
BTOパソコン・パソコン関連商品がお買い得!パソコン工房のセール

動作確認

それでは動作確認をしていきます。

一度コマンドプロンプトを閉じて、再度立ち上げ環境をアクティベートします。

その後、pythonと打ち込んでPythonを起動します。

起動したら以下のコマンドを打ち込みenterキーを押します。

from tensorflow.python.client import device_lib

その後に

device_lib.list_local_devices()

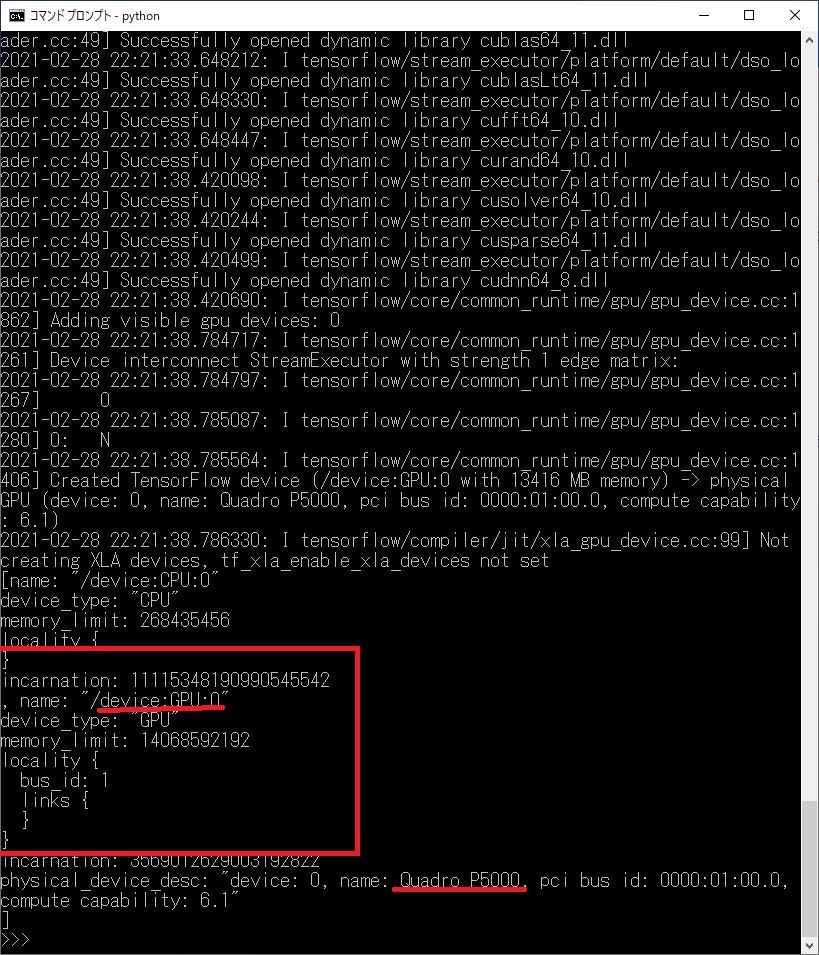
と打ち込み、enterキーを押することでデバイスの状態を確認することができます。

デバイスのタイプが「CPU」しか認識されていません。GPUの文字がどこにも見当たりません。認識していません。


GPUが認識しないときの対応

GPUが認識されていないときは、まずGPUのドライバーのバージョン確認、続いてドライバーに対応したCUDA Toolkit、cuDNNのバージョンの互換性をチェックしましょう。

そこに問題がない場合は以下を試してみてください。

CUDA Toolkitのフォルダ内、デフォルトでインストールしている場合は以下のパスとなります。

C:\Program Files\NVIDIA GPU Computing Toolkit\CUDA\v11.2

ちなみに、「v11.2」はご自身のインストールしたバージョンとなります。

その中の「bin」フォルダ中「cusolver64_11.dll」というファイルがあります。

その名称を「cusolver64_10.dll」に変更します。

変更が完了したら再度先ほどのコードを実行してみましょう。

device_lib.list_local_devices()

結果はどうでしたか?

先ほどは「CPU」のみの表示でしたが、今回はきちんとGPUの名称もきちんと認識されています。

「GPU」が認識されました。

これでセットアップが完了です。


おつかれさまでした。

広告
上新電機 パソコン買取サービス
The post GPU版 tensorflowをセットアップ②(tensorflowと動作確認) first appeared on 診療放射線技師がPythonをはじめました。.]]>
1198